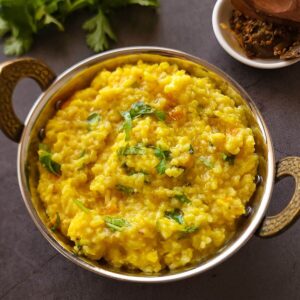
Moong Dal Khichdi is a simple, wholesome dish from India and is a comfort food for many Indians. It's made by cooking yellow mung beans and rice together and gently flavoring them with Indian spices. Khichdi is so delicious that many travelers from History like Ibn Batuta of Morocco, Afanasiy Nikitin from Russia, and Greek King Seleucus mentioned Khichdi in their writings.
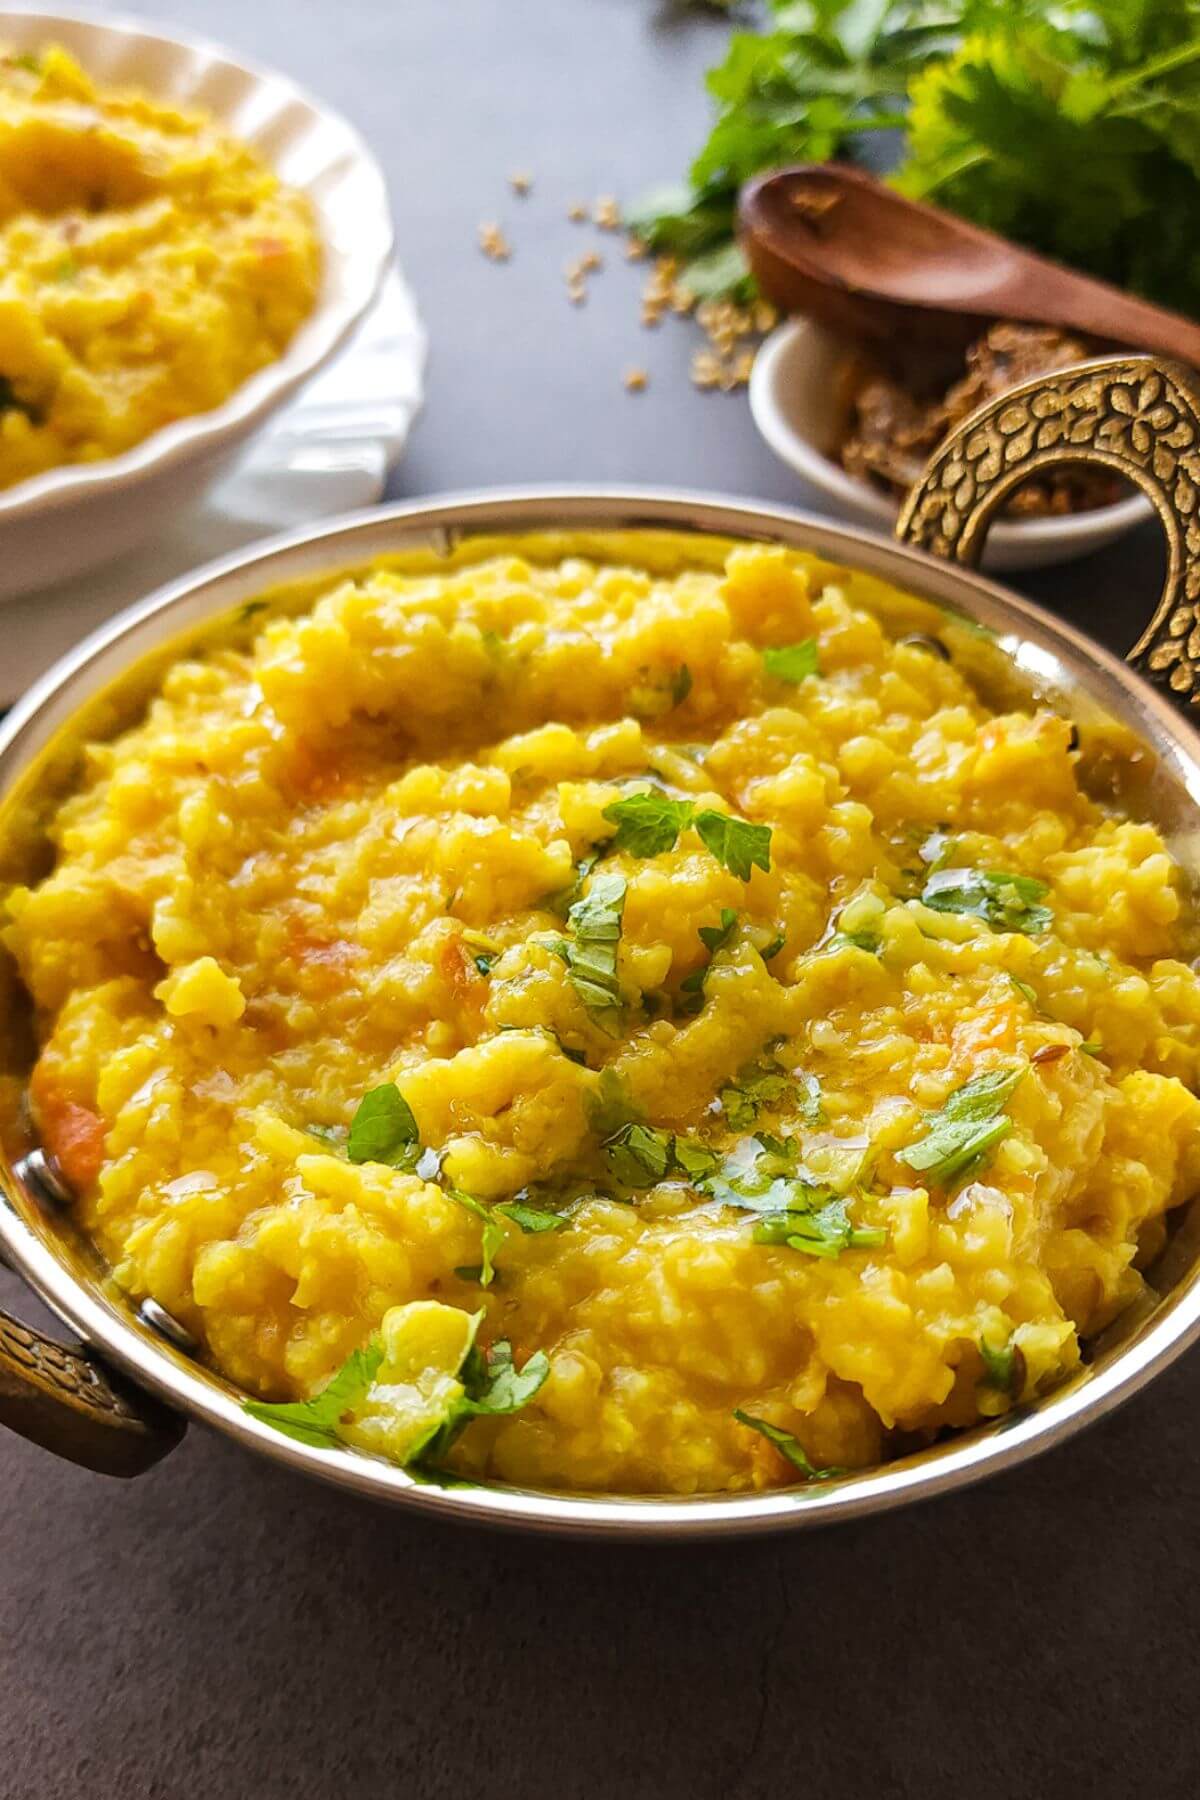
Today I am sharing the recipe for one of the most humble dishes from India called moong dal khichdi.
This dish is so comforting and tasty that many travelers from History like Ibn Batuta of Morocco, Afanasiy Nikitin from Russia, and Greek King Seleucus mentioned Khichdi in their writings.
Khichdi is a comfort food for a lot of Indians and it's also the first semi-solid food that most Indian babies taste. This is also the most common food that Indian mothers give to their kids when they fall sick.
There are different ways of making khichdi and here I am sharing the most basic and common recipe of khichdi called moong dal khichdi which is made with yellow mung beans (moong dal) and rice.
Jump to:
- What is Khichdi?
- What's needed to make moong dal khichdi?
- Ingredient notes
- The ratio of lentils and rice in Khichdi
- How to make (step-by-step process)?
- How to serve?
- Can it be made in advance?
- Recipe tips, tricks, and variation suggestions
- Frequently asked questions
- More mung bean recipes
- More easy one-pot meal ideas
- Recipe
What is Khichdi?
Khichdi is a one-pot meal recipe from the Indian subcontinent which is made by cooking rice or some other grains like bajra (pearl millet), lentils, and sometimes vegetables together over low heat until everything blends well. The dish is mildly flavored with some very basic Indian spices.
It’s believed that the National Dish of Egypt Koshari was also inspired by Khichdi.
Even doctors and nutritionists in India suggest eating Khichdi to people having digestion-related ailments or those who are on a weight loss journey.
You can make khichdi with different lentils like this Toor dal khichdi that's made with split pigeon peas and rice. Or, use quinoa instead of rice as I have done in this quinoa khichdi recipe.
What's needed to make moong dal khichdi?
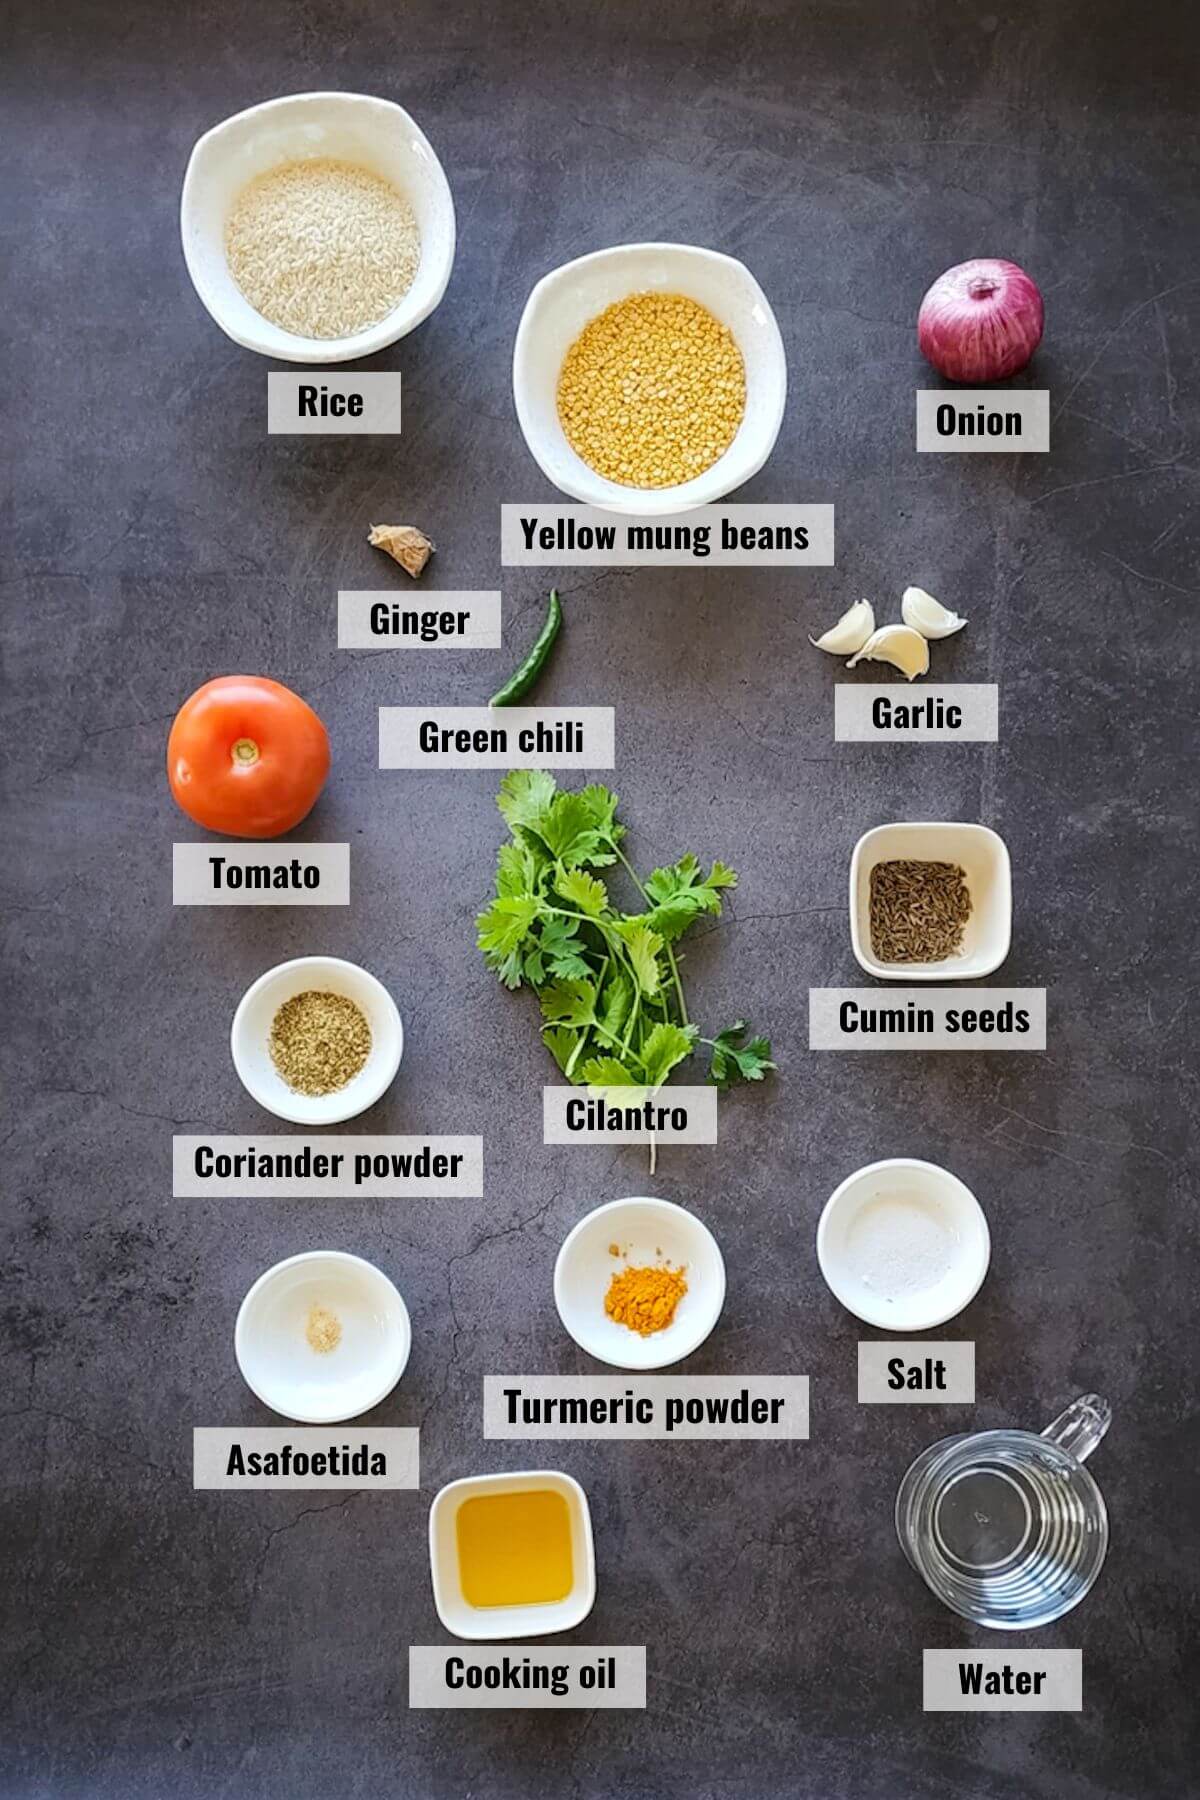
To make moong dal khichdi, you will need the ingredients shown below:
Ingredient notes
- Rice: Use a variety of rice with short or medium-sized grains. I prefer using sona masoori or broken basmati rice for khichdi. Broken rice releases more starch giving khichdi the perfect consistency.
- Yellow mung beans: Also known as dhuli moong dal or yellow moong dal in India. Though other lentils are also used to make khichdi the one made with yellow mung beans is the most common one.
- Coriander powder: It's the ground form of dried coriander seeds and is used as a spice in many Indian recipes.
- Asafoetida: Also known as hing in Hindi, it's the dried form of a gum resin of ferula plant. It's used as a spice as well as a medicine in ayurveda. Asafoetida has an extremely strong flavor and aroma so only a pinch of this spice is used in recipes.
- Cooking oil: Use any neutral-flavored cooking oil or ghee (clarified butter) to make this recipe.
Other ingredient details and nutritional information are given in the recipe card ahead.
The ratio of lentils and rice in Khichdi
Different people use different ratios of lentils and rice in Khichdi. You can also change the ratio to your liking.
I prefer using equal portions of lentils and rice. However, if I want to make a low-carb Khichdi, I either use a low-carb grain or just increase the portion of lentils.
How to make (step-by-step process)?
To make khichdi with moong dal, just follow the easy step-by-step instructions given below:
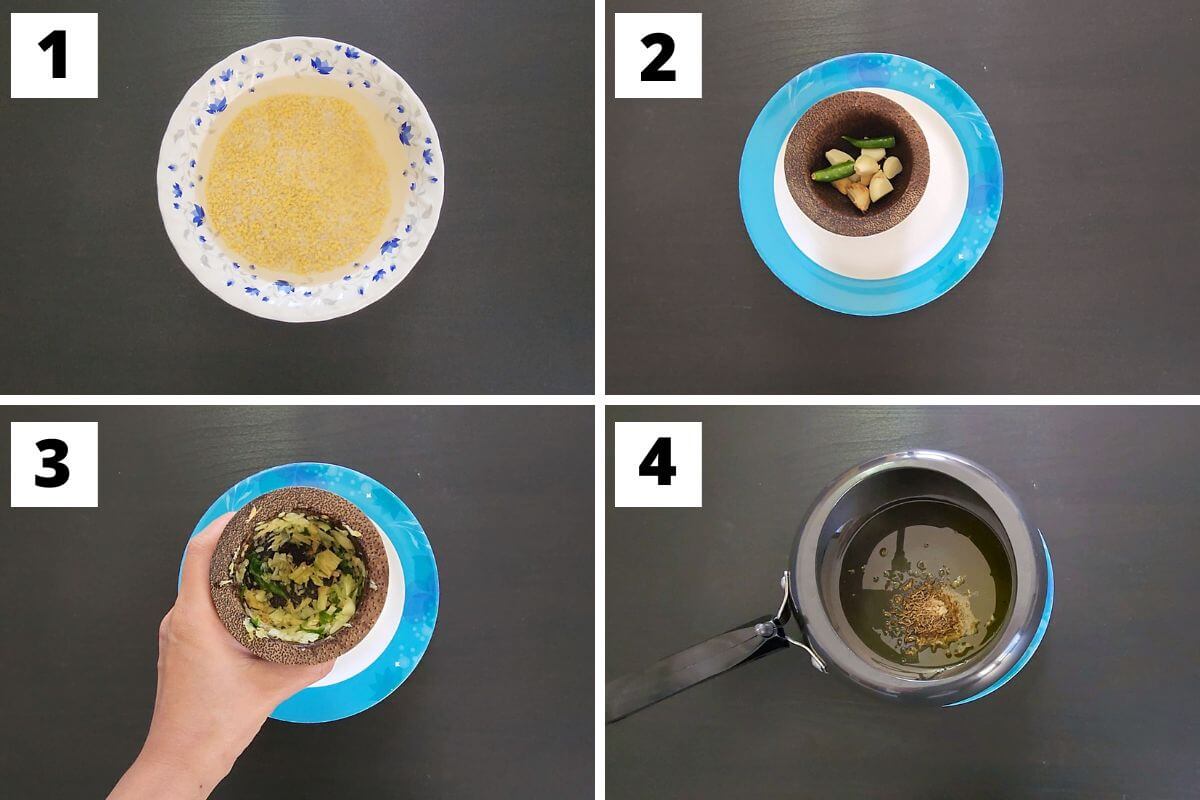
Step 1: Rinse lentils and rice. Soak them in water for at least 15 minutes or while you do the other preparation for khichdi.
Step 2: Put roughly chopped ginger, garlic, and green chilies in a mortar.
Step 3: Crush them with the pestle to make a coarse paste. Keep the paste aside.
Step 4: Heat oil in a pressure cooker. Add cumin seeds and asafoetida. Saute for a few seconds.
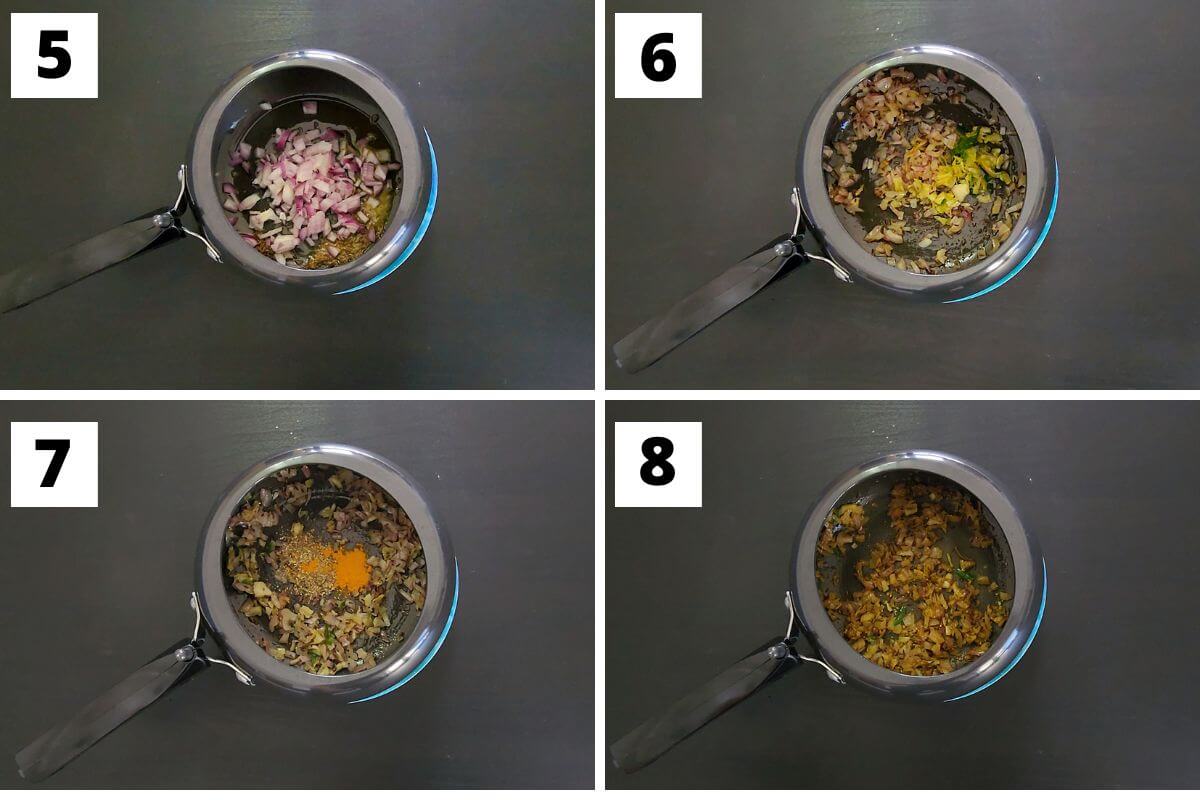
Step 5: Add chopped onion and cook until it turns translucent.
Step 6: Add ginger garlic paste and saute for a few seconds.
Step 7: Add coriander powder and turmeric powder.
Step 8: Saute for a few seconds.
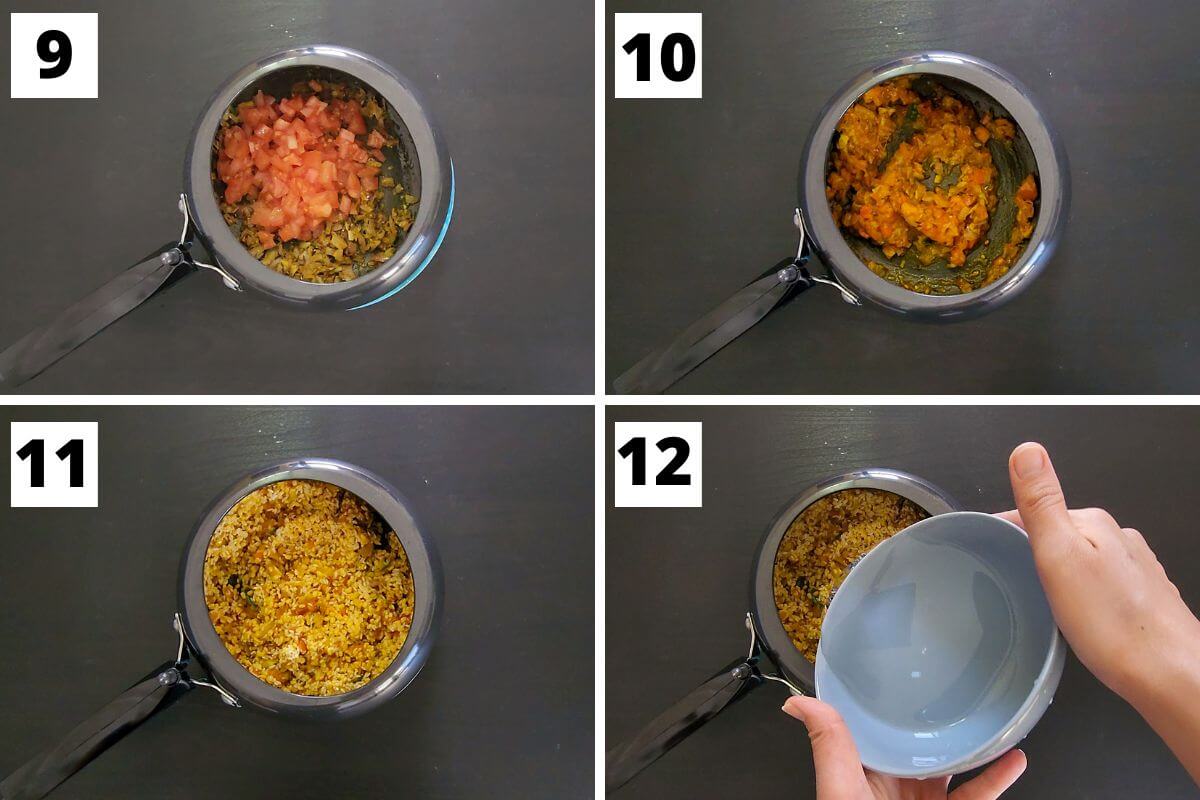
Step 9: Add chopped tomato and salt.
Step 10: Cook for 3-4 minutes or until the tomatoes turn mushy.
Step 11: Add rinsed rice and lentils. Saute for a minute.
Step 12: Add water.
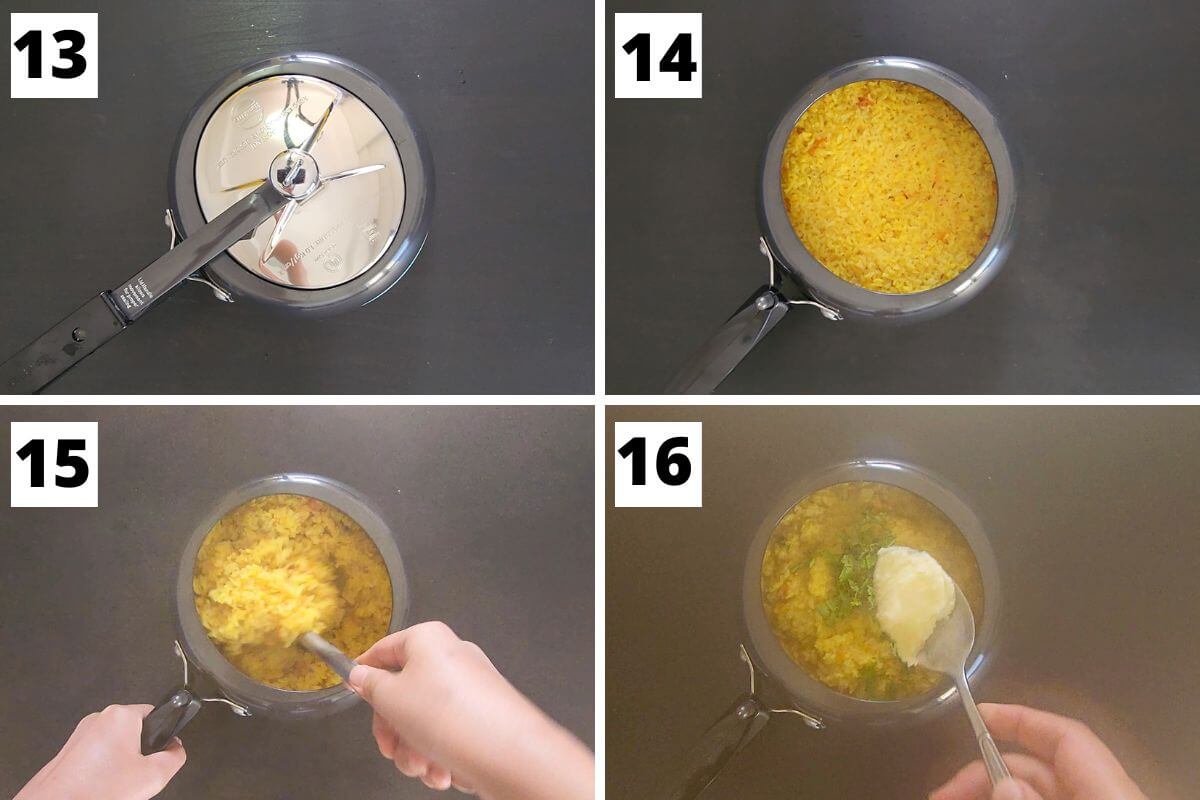
Step 13: Mix everything and put on the lid of the pressure cooker.
Step 14: Cook on a medium flame till 3 whistles and then switch off the stove. Allow the pressure to get released naturally and then open the lid.
Step 15: Mix everything.
Step 16: Add chopped cilantro and a dollop of ghee. Mix.
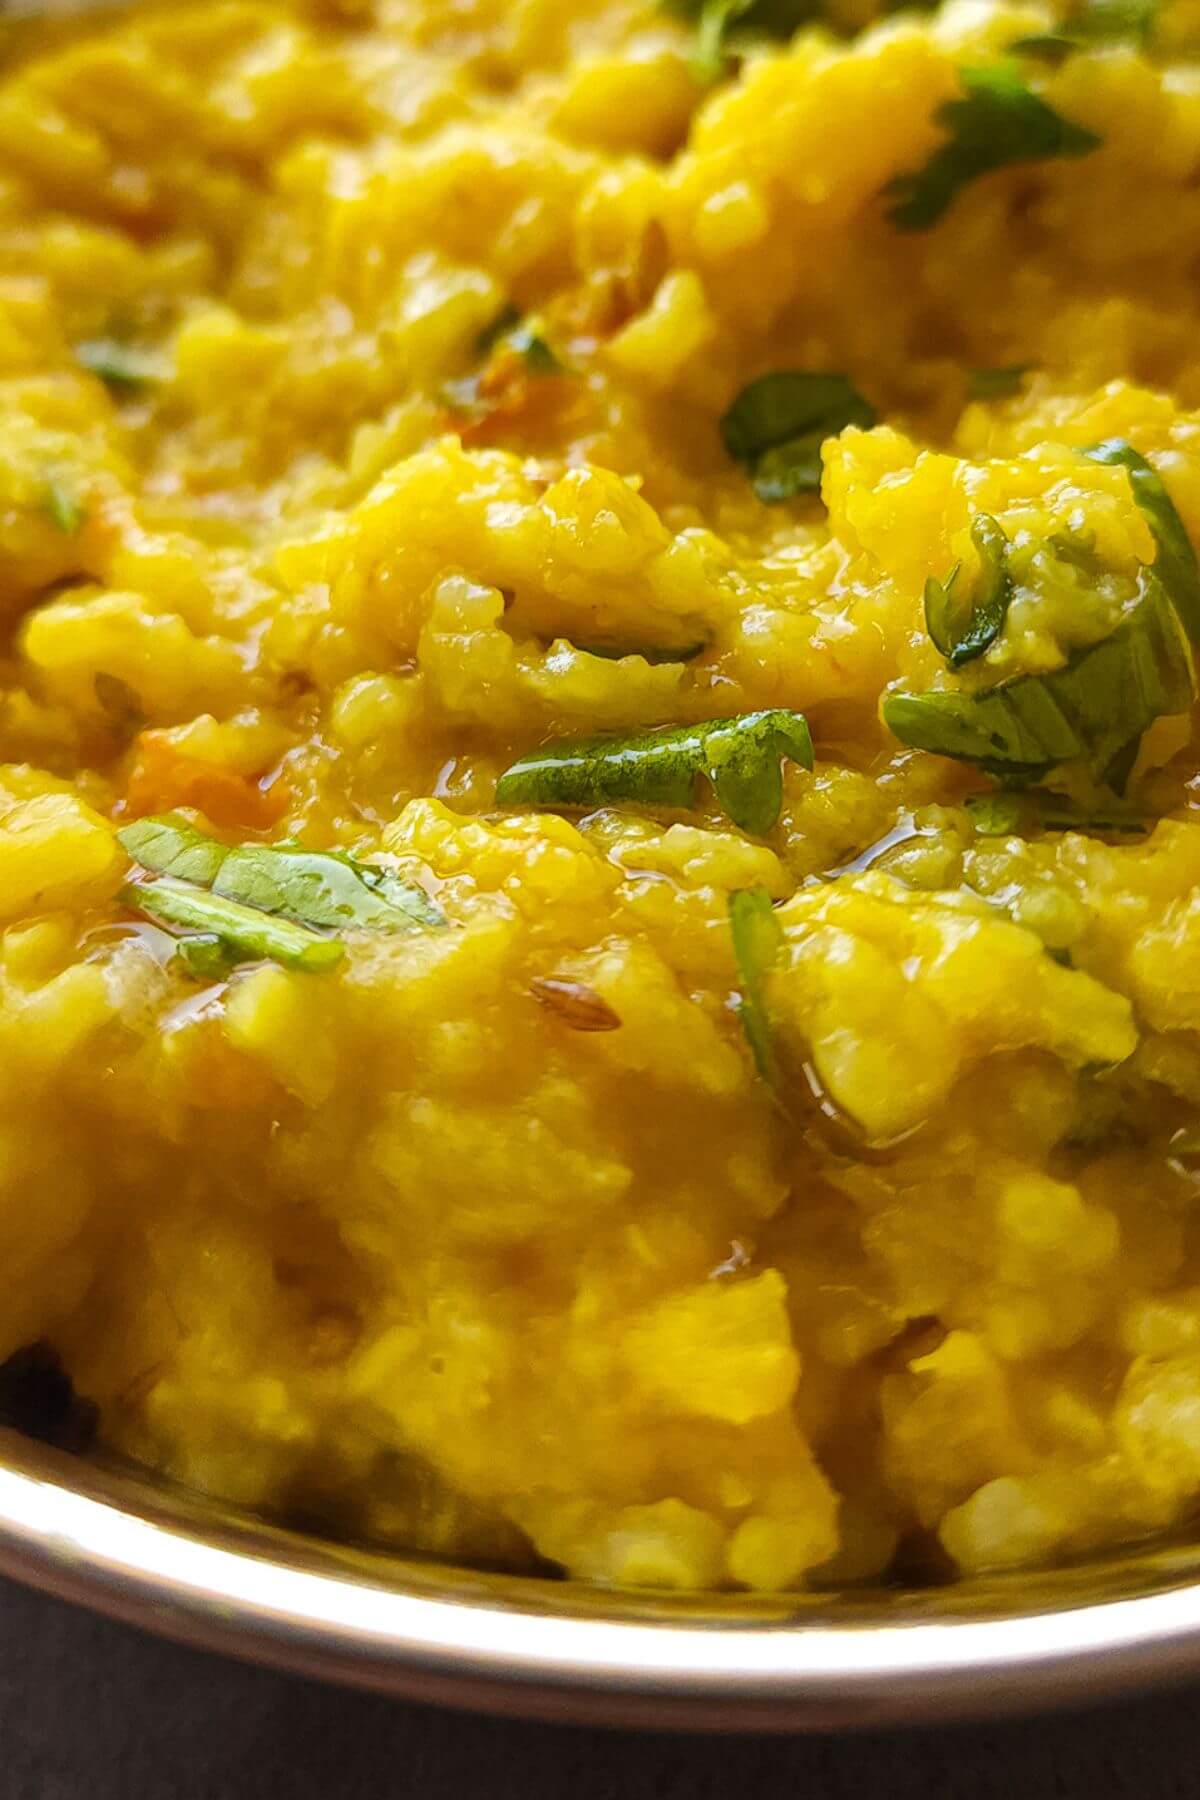
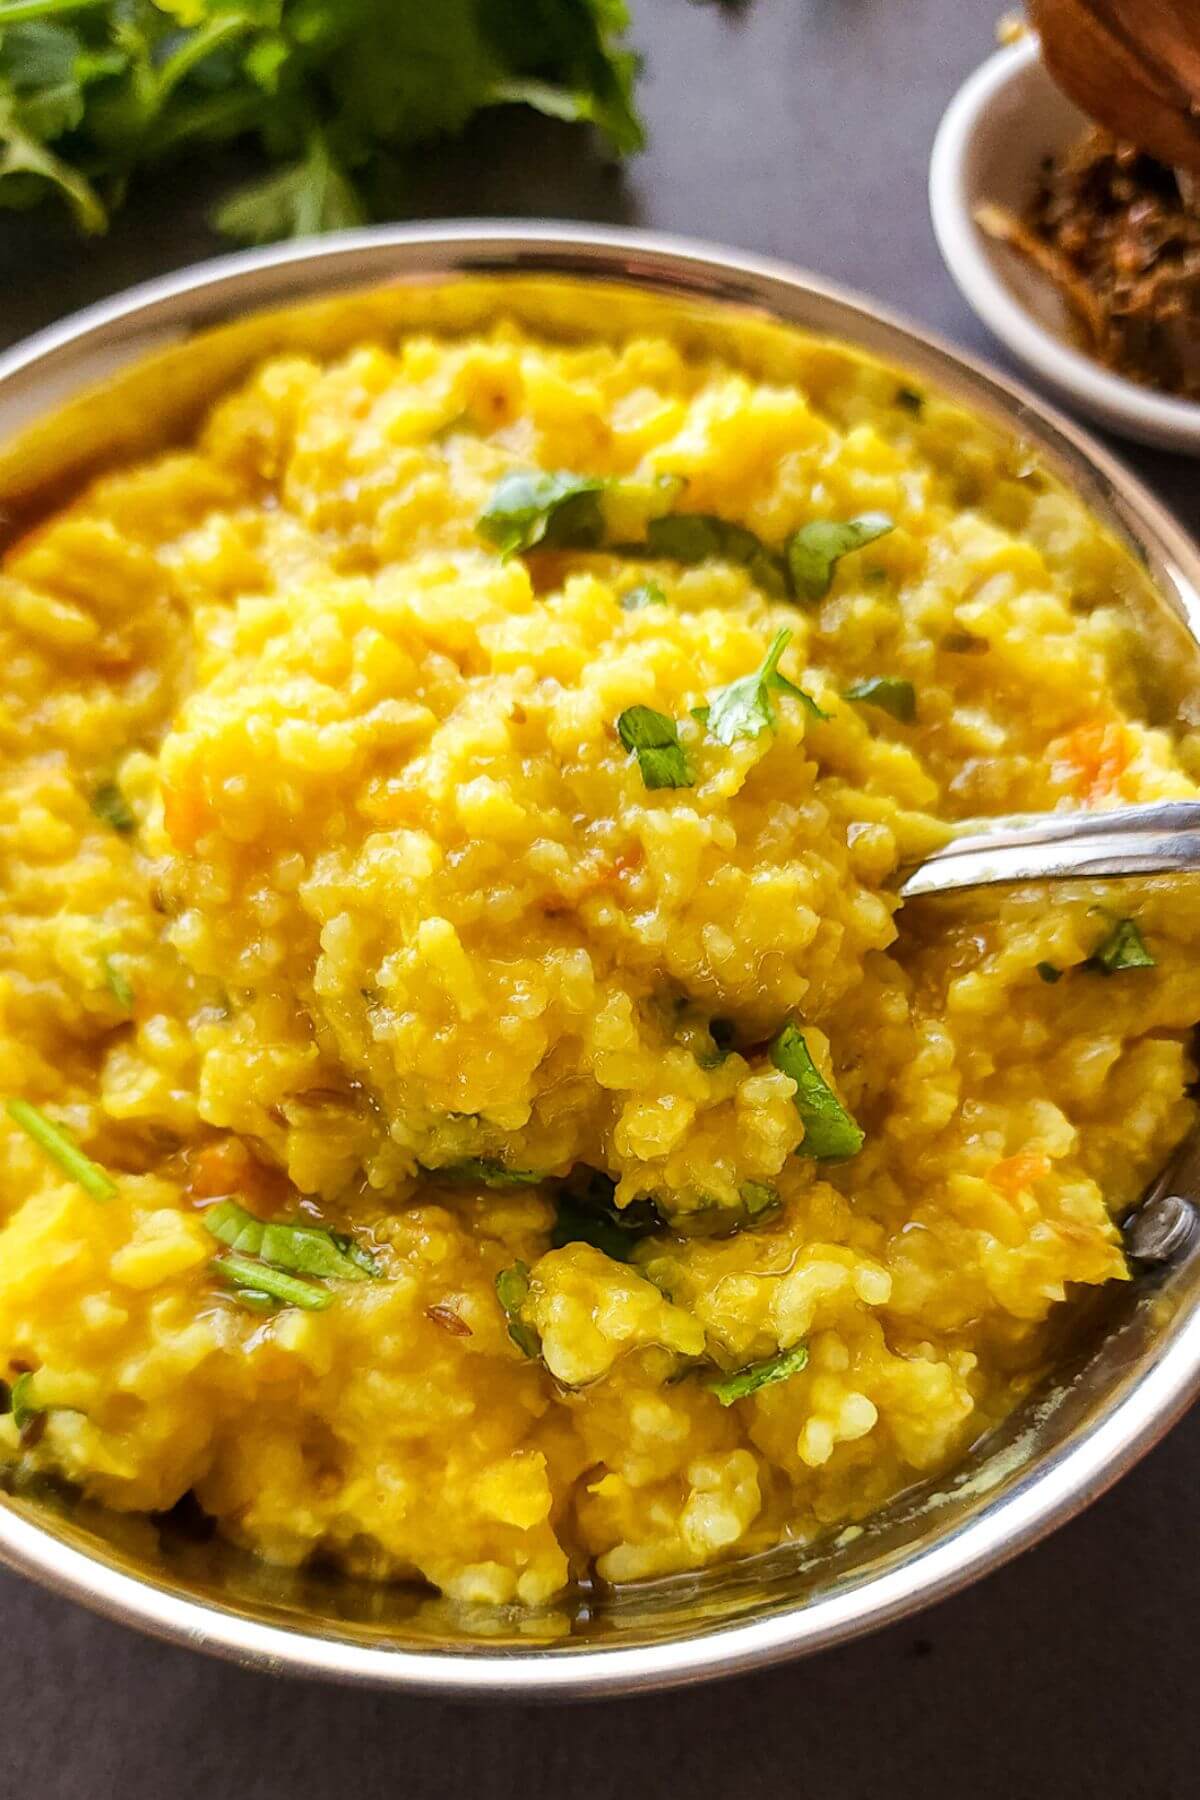
Your wholesome yellow moong dal khichdi is ready to be enjoyed!
How to serve?
There is a saying about the side dishes served with Khichdi – Khichdi tere chaar yaar - dahi, mooli, ghee, achaar. It means Khichdi has four friends – yogurt, radish, clarified butter(ghee), and pickle. So it’s mostly served with them.
If you don’t have radish, you can also serve it with thinly sliced onions or any other salad like Kachumber Salad or lachha pyaz.
We also serve it with toasted papadum on the side.
It can also be enjoyed just like that but adding a spoonful of ghee to a bowl of hot Khichdi, takes it to a different level. And, most people eat it like that.
Always serve it hot.
Can it be made in advance?
Yes, you can make it in advance. To store, allow to reach room temperature then transfer to an airtight container and refrigerate for 2-3 days.
It will become thick if left in the fridge so while reheating add some boiling hot water and salt. Reheat either on the stovetop or in a microwave until evenly heated. Keep stirring in between.
Recipe tips, tricks, and variation suggestions
- Always use small or medium-sized rice grains to make Khichdi.
- You can also add vegetables like green peas, spinach, carrot, and cauliflower to make it even more nutritious.
- If your khichdi has come out too thick and you prefer khichdi with a thinner consistency, add more hot water and cook for a few more minutes without putting on the lid of the pressure cooker.
- For a low-carb khichdi, add more lentils and less rice.
Frequently asked questions
All the main ingredients used to make Khichdi are vegan. However, the cooking medium is generally ghee which is clarified butter. Also, most people drizzle ghee on top of Khichdi before eating and consider khichdi incomplete without ghee.
If you are a vegan, just use a vegan cooking medium and don’t drizzle ghee on top.
Use rice with small or medium-sized grains for khichdi. If you can find broken rice that's the best for this recipe as it releases more starch giving khichdi a very creamy texture.
Moong dal khichdi can be cooked in a regular pot too. Just add around 7 cups of water and cook on a medium flame until everything blends together and you get the desired consistency. It will take around 45 minutes to an hour to get cooked if you use a regular pot.
Naturally, it's gluten-free but a lot of brands add wheat flour to asafoetida while processing it. So, if you are on a gluten-free diet, make sure to check the ingredients and buy gluten-free asafoetida.
More mung bean recipes
Mung bean has a lot of health benefits so you should make it a regular part of your diet. If you are looking for ideas to use mung beans in your recipes then don't miss to check the following recipes:
More easy one-pot meal ideas
Who doesn't love easy one-pot meals? Especially after a long tiring day or on a cold night. If you are looking for easy one-pot vegan or vegetarian meal ideas then do check the following recipes on my blog:
If you liked this recipe, please leave a star rating ⭐⭐⭐⭐⭐ in the recipe card below. You can also follow me on Instagram, Youtube, and Pinterest.
Recipe
Moong Dal Khichdi
Equipment
- Pressure cooker/ regular pot
Ingredients
- ½ cup short/ medium grain rice
- ½ cup yellow mung beans dhuli moong dal
- 1 small onion finely chopped
- 1 medium-sized tomato finely chopped
- 2-3 garlic cloves
- 1 inch piece of ginger
- 1-2 green chilies
- 1 teaspoon cumin seeds
- ½ tablespoon coriander powder
- ¼ teaspoon turmeric powder
- ⅛ teaspoon asafoetida
- Salt to taste
- 1 tablespoon Ghee or any other cooking oil of choice
- 4 cups water
- Chopped cilantro for garnishing
Instructions
- Mix rice and lentils. and wash nicely. Soak them in water for around 15 minutes.
- While the lentils and rice are getting soaked, put roughly chopped garlic, ginger, and green chilies in a mortar and pestle. Crush to make a coarse paste and keep it aside.
- Heat ghee or oil in a pressure cooker. Add cumin seeds and asafoetida. Saute for a few seconds.
- Add chopped onion and cook until it becomes translucent.
- Add ginger, garlic, and green chili paste. Saute for a few seconds.
- Once the raw smell of garlic goes away add coriander powder and turmeric powder. Saute for a few seconds.
- Add chopped tomatoes and salt. Cook for 3-4 minutes or until the tomatoes turn mushy.
- Drain the water in which the lentils and rice were soaked. Put the rice and lentils in the pressure cooker. Saute for 1-2 minutes.
- Add 4 cups of water and mix everything. Put on the lid of the pressure cooker and cook till 3 whistles on a medium flame.
- Allow the pressure of the pressure cooker to get released naturally and then open the lid.
- Add chopped cilantro and a dollop of ghee. Mix everything and serve hot.
Video
Notes
- Always use small or medium-sized rice grains to make Khichdi.
- You can also cook moong dal khichdi in a regular pot. Just add around 7 cups of water and cook on a medium flame until you get the desired consistency. It will take around 45 minutes to an hour to get cooked if you use a regular pot.
- You can also add vegetables like green peas, spinach, carrot, and cauliflower to make it even more nutritious.
- If your khichdi has come out too thick and you prefer khichdi with a thinner consistency, add more hot water and cook for a few more minutes without putting on the lid of the pressure cooker.
- If you are on a gluten-free diet make sure to use gluten-free asafoetida in the recipe.
- More recipe tips and tricks are shared in the post above. Please follow them to make this recipe.

Leave a Reply